单元测试插件
请从图标栏中点击 ![]() (”双重检查”)的图标,以进入Solidity Unit Testing插件。
(”双重检查”)的图标,以进入Solidity Unit Testing插件。
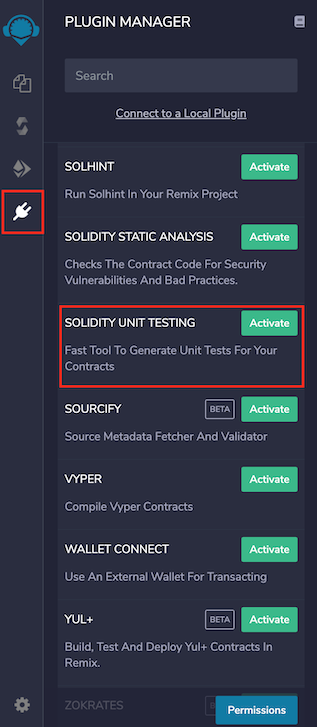
如果您以前没有使用过此插件并且没有看到双重检查图标,则需要从Remix插件管理器中激活它。
点击  (插件)图标以进入插件管理器并激活Solidity Unit Testing插件。
现在,双重检查图标将出现在左侧图标栏中。单击该图标将在侧面板中加载插件。
或者,只需从Remix IDE主页选中Solidity环境。这将激活Solidity编译器、部署和运行交易和Solidity静态分析插件,以及Solidity Unit Testing插件。
成功加载后,插件看起来像这样:
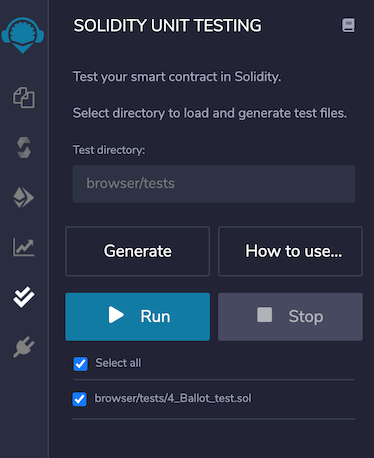
测试目录
该插件要求您提供一个目录,该目录仅用于此插件的工作区。要选择目录,只需在路径中加入“/”,它会显示可能的选项。
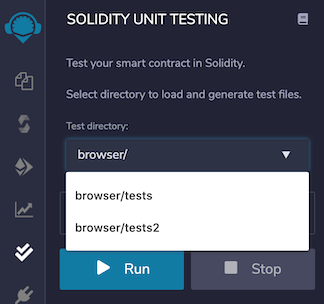
选定目录后,该目录将用于加载测试文件和存储新生成的测试文件。
默认测试目录是browser/tests。
生成
选择要测试的Solidity文件,然后单击“生成”按钮。它会在测试目录中生成专用于所选文件的测试文件。
如果没有选择文件,则仍会创建一个带有通用名称newFile_test.sol的文件。
该文件包含足够的信息,可以让您更好地理解如何为合约开发测试。
通用文件如下所示:
pragma solidity >=0.4.22 <0.8.0;
import "remix_tests.sol"; // this import is automatically injected by Remix.
import "remix_accounts.sol";
// Import here the file to test.

// File name has to end with '_test.sol', this file can contain more than one testSuite contracts
contract testSuite {

    /// 'beforeAll' runs before all other tests
    /// More special functions are: 'beforeEach', 'beforeAll', 'afterEach' & 'afterAll'
    function beforeAll() public {
        // Here should instantiate tested contract
        Assert.equal(uint(1), uint(1), "1 should be equal to 1");
    }

    function checkSuccess() public {
        // Use 'Assert' to test the contract,
        // See documentation: https://remix-ide.readthedocs.io/en/latest/assert_library.html
        Assert.equal(uint(2), uint(2), "2 should be equal to 2");
        Assert.notEqual(uint(2), uint(3), "2 should not be equal to 3");
    }

    function checkSuccess2() public pure returns (bool) {
        // Use the return value (true or false) to test the contract
        return true;
    }

    function checkFailure() public {
        Assert.equal(uint(1), uint(2), "1 is not equal to 2");
    }

    /// Custom Transaction Context
    /// See more: https://remix-ide.readthedocs.io/en/latest/unittesting.html#customization
    /// #sender: account-1
    /// #value: 100
    function checkSenderAndValue() public payable {
        // account index varies 0-9, value is in wei
        Assert.equal(msg.sender, TestsAccounts.getAccount(1), "Invalid sender");
        Assert.equal(msg.value, 100, "Invalid value");
    }
}
编写测试
编写足够的单元测试,以确保您的合约在不同的情况下按预期工作。
Remix注入了一个内置的assert库,可用于测试。您可以在此处查看库的文档 这里。
除此之外,Remix允许在测试文件中使用一些特殊函数,以使测试更具结构性。它们是:
beforeEach()- 在每次测试之前运行beforeAll()- 在所有测试之前运行afterEach()- 在每次测试之后运行afterAll()- 在所有测试之后运行
开始前,请看 这个简单的例子。
运行
当你完成编写测试后,选择文件并点击“运行”以执行测试。执行将在单独的环境中运行。完成一个文件的执行后,将显示如下的测试摘要:
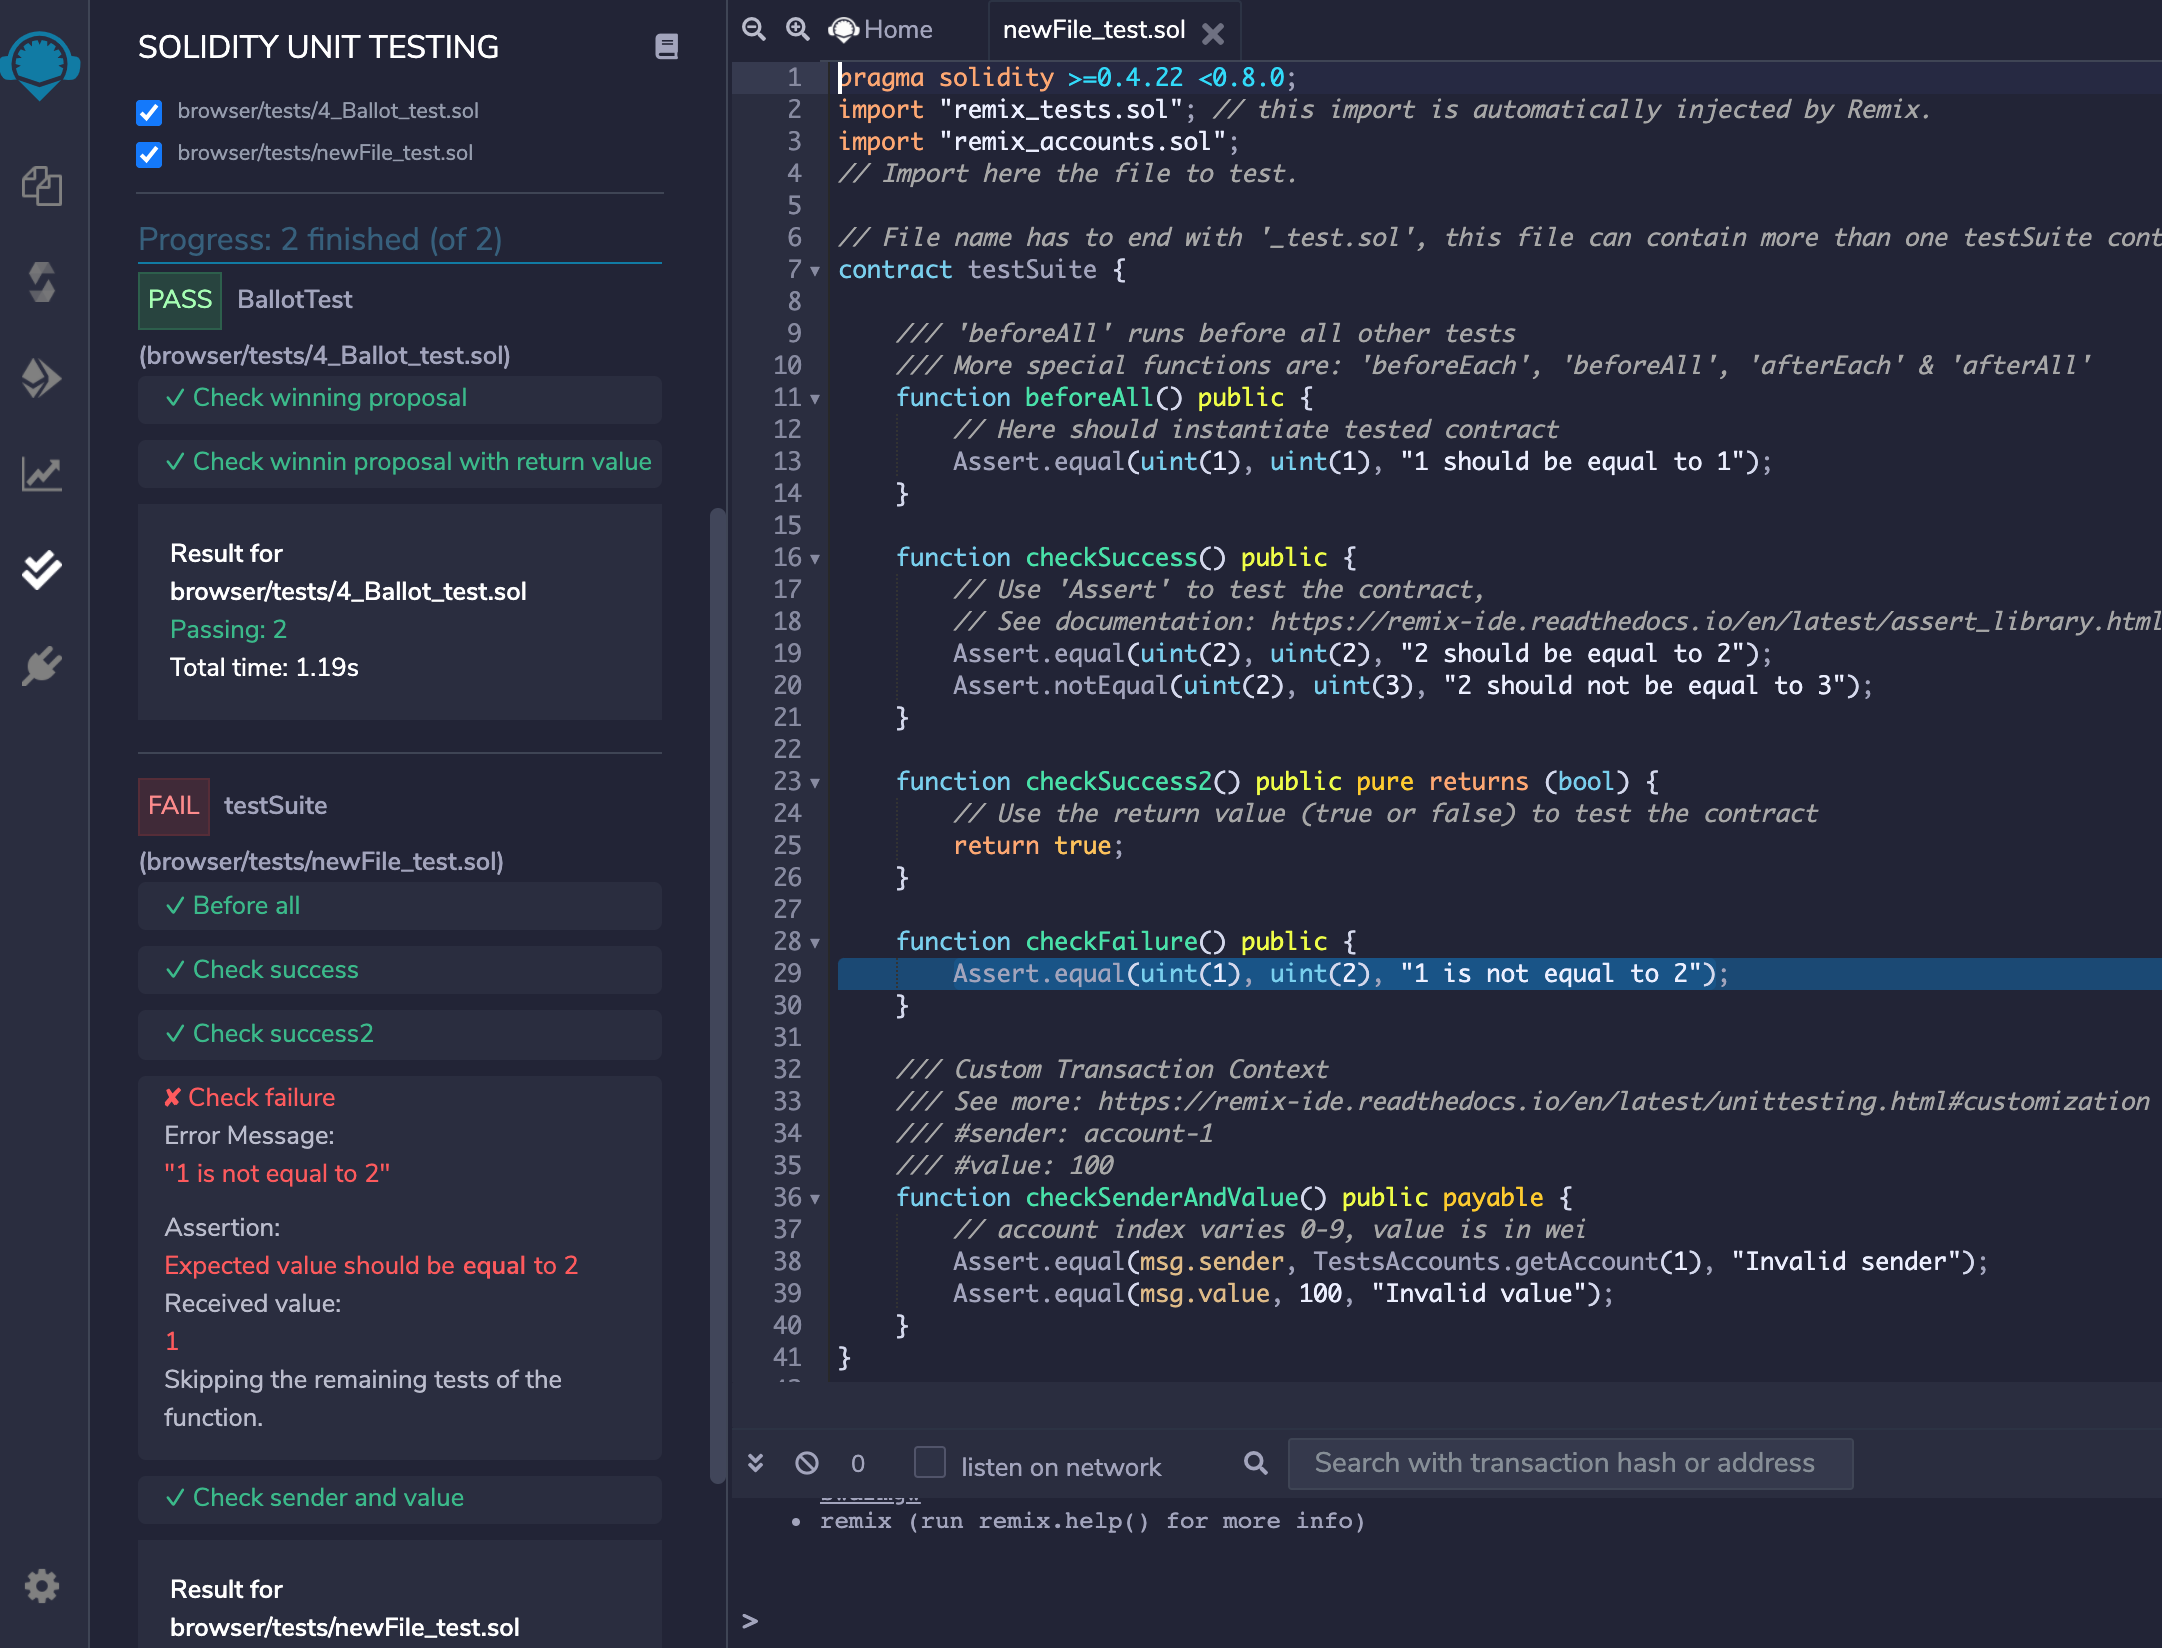
对于失败的测试,将有更多的断言细节来分析问题。单击失败的测试将在编辑器中高亮显示相关代码行。
停止
如果您选择运行多个文件的测试并想要停止执行,请单击停止按钮。它将在运行当前文件的测试后停止执行。
自定义
Remix 帮助用户通过各种类型的自定义来正确测试合约。
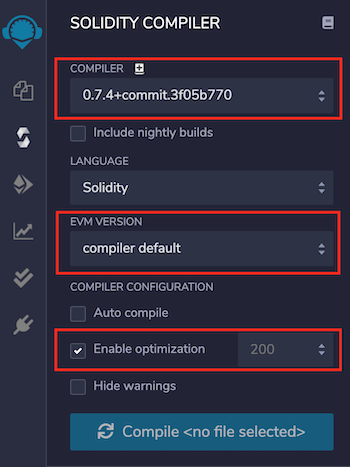
1. 自定义编译器上下文
Solidity Unit Testing插件使用Solidity编译器插件进行编译器配置。在Solidity编译器插件中,配置编译器、EVM版本、启用优化,这些配置会在Solidity Unit Testing运行单元测试之前合约的编译上。
2. 自定义交易上下文
要与合约的方法交互,交易的主要参数是from地址、value和gas。通常,使用这些参数的不同值来测试方法的行为。
在交易的中,您可以使用NatSpec注释输入自定义的msg.sender和msg.value值,如:
/// #sender: account-0
/// #value: 10
function checkSenderIs0AndValueis10 () public payable {
    Assert.equal(msg.sender, TestsAccounts.getAccount(0), "wrong sender in checkSenderIs0AndValueis10");
    Assert.equal(msg.value, 10, "wrong value in checkSenderIs0AndValueis10");
}
使用的指令:
参数必须在方法的NatSpec中定义
每个参数键都应以 (#) 为前缀,并以一个空格(: )后缀结束,如
#sender:和#value:目前,仅可为
sender和value参数进行自定义Sender是交易的发送方地址,可在合约方法中使用
msg.sender访问,必须以固定格式“account-<account_index>”定义<account_index>的取值范围取决于remix-ide版本号,v0.10.0之前为0-2,之后为0-9必须在测试文件中导入
remix_accounts.sol才能使用自定义的senderValue是以wei为单位发送的
value,可在合约方法中使用msg.value访问,必须是一个数字。
对于gas,Remix会在内部估算每个交易所需的gas。但是,如果合约部署失败并出现gas不足错误,则会尝试通过将gas加倍来重新部署它。如果使用加倍gas的部署仍然失败,则会显示错误信息:
Various test examples can be seen in examples section.
要记住的要点
测试合约不能含有带参数的方法。如果有这样的方法,将显示错误信息:“在测试合约中,方法’methodname’不能带有参数”。
在remix-ide v0.10.0之前,测试账户数为3,在之后为10。
如果导入了
remix_accounts.sol的测试文件,Solidity Compiler插件无法成功编译,请不要担心,这不会影响它在Solidity Unit Testing插件中的功能。