Explorateur de fichiers
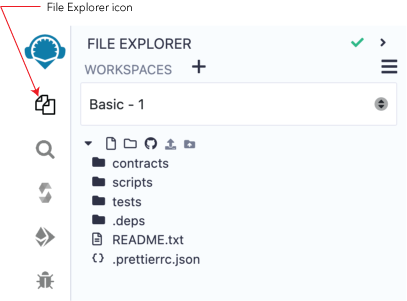
The File Explorer is the plugin responsible for managing files. It includes a pop-up menu that is activated when you right-click on a file.
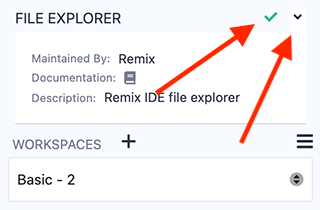
The green shield icon at the top of the File Explorer page on the Sidebar indicates that the plugin is maintained by Remix Team. When you click the caret next to the icon, the Sidebar will display details about the plugin, including a link to its documentation page.
File storage
By default, Remix IDE stores files in IndexedDB, a database built into the browser. Your data is only stored locally in your browser and not on an external server.
Browser storage is ephemeral and browser crashes might lead to complete loss of data
Thus, it is important to have an alternative file backup/saving strategy.
Some recommended strategies include:
Cloud storage
Note
Cloud storage is currently only available to users in our beta program.
Enabling cloud storage on Remix web saves your work to your Remix account, auto-syncing every change so nothing is lost to browser crashes. Your files are available on any device when you are logged in.
Snapshots of your workspace are taken automatically as you work. Each snapshot captures the workspace state at a single point in time and is not a complete backup; it may be seconds to minutes behind your actual files. Each snapshot is kept for 7 days before being removed. You can download all snapshots currently within that window as a single zip file to inspect locally.
To enable cloud storage, click the switch at the top left of the Top Bar as shown in the image below.
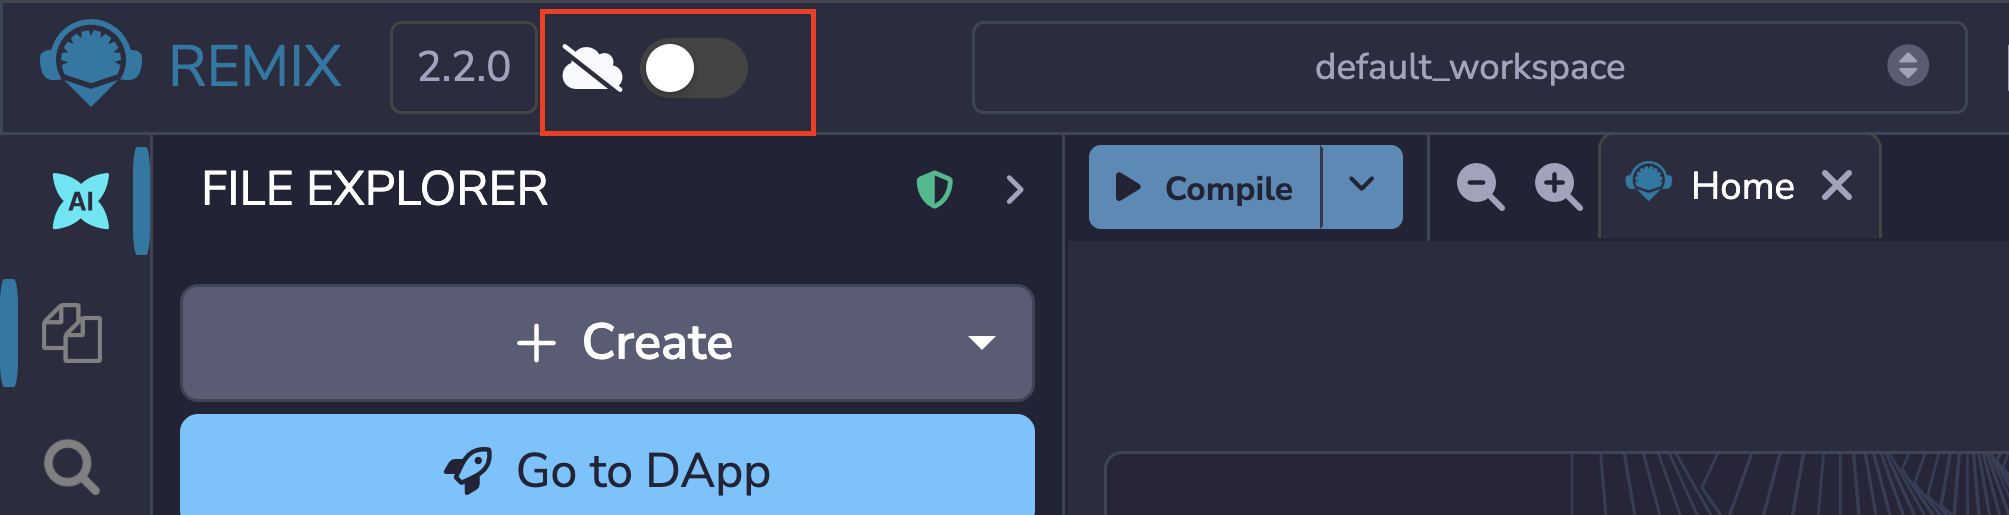
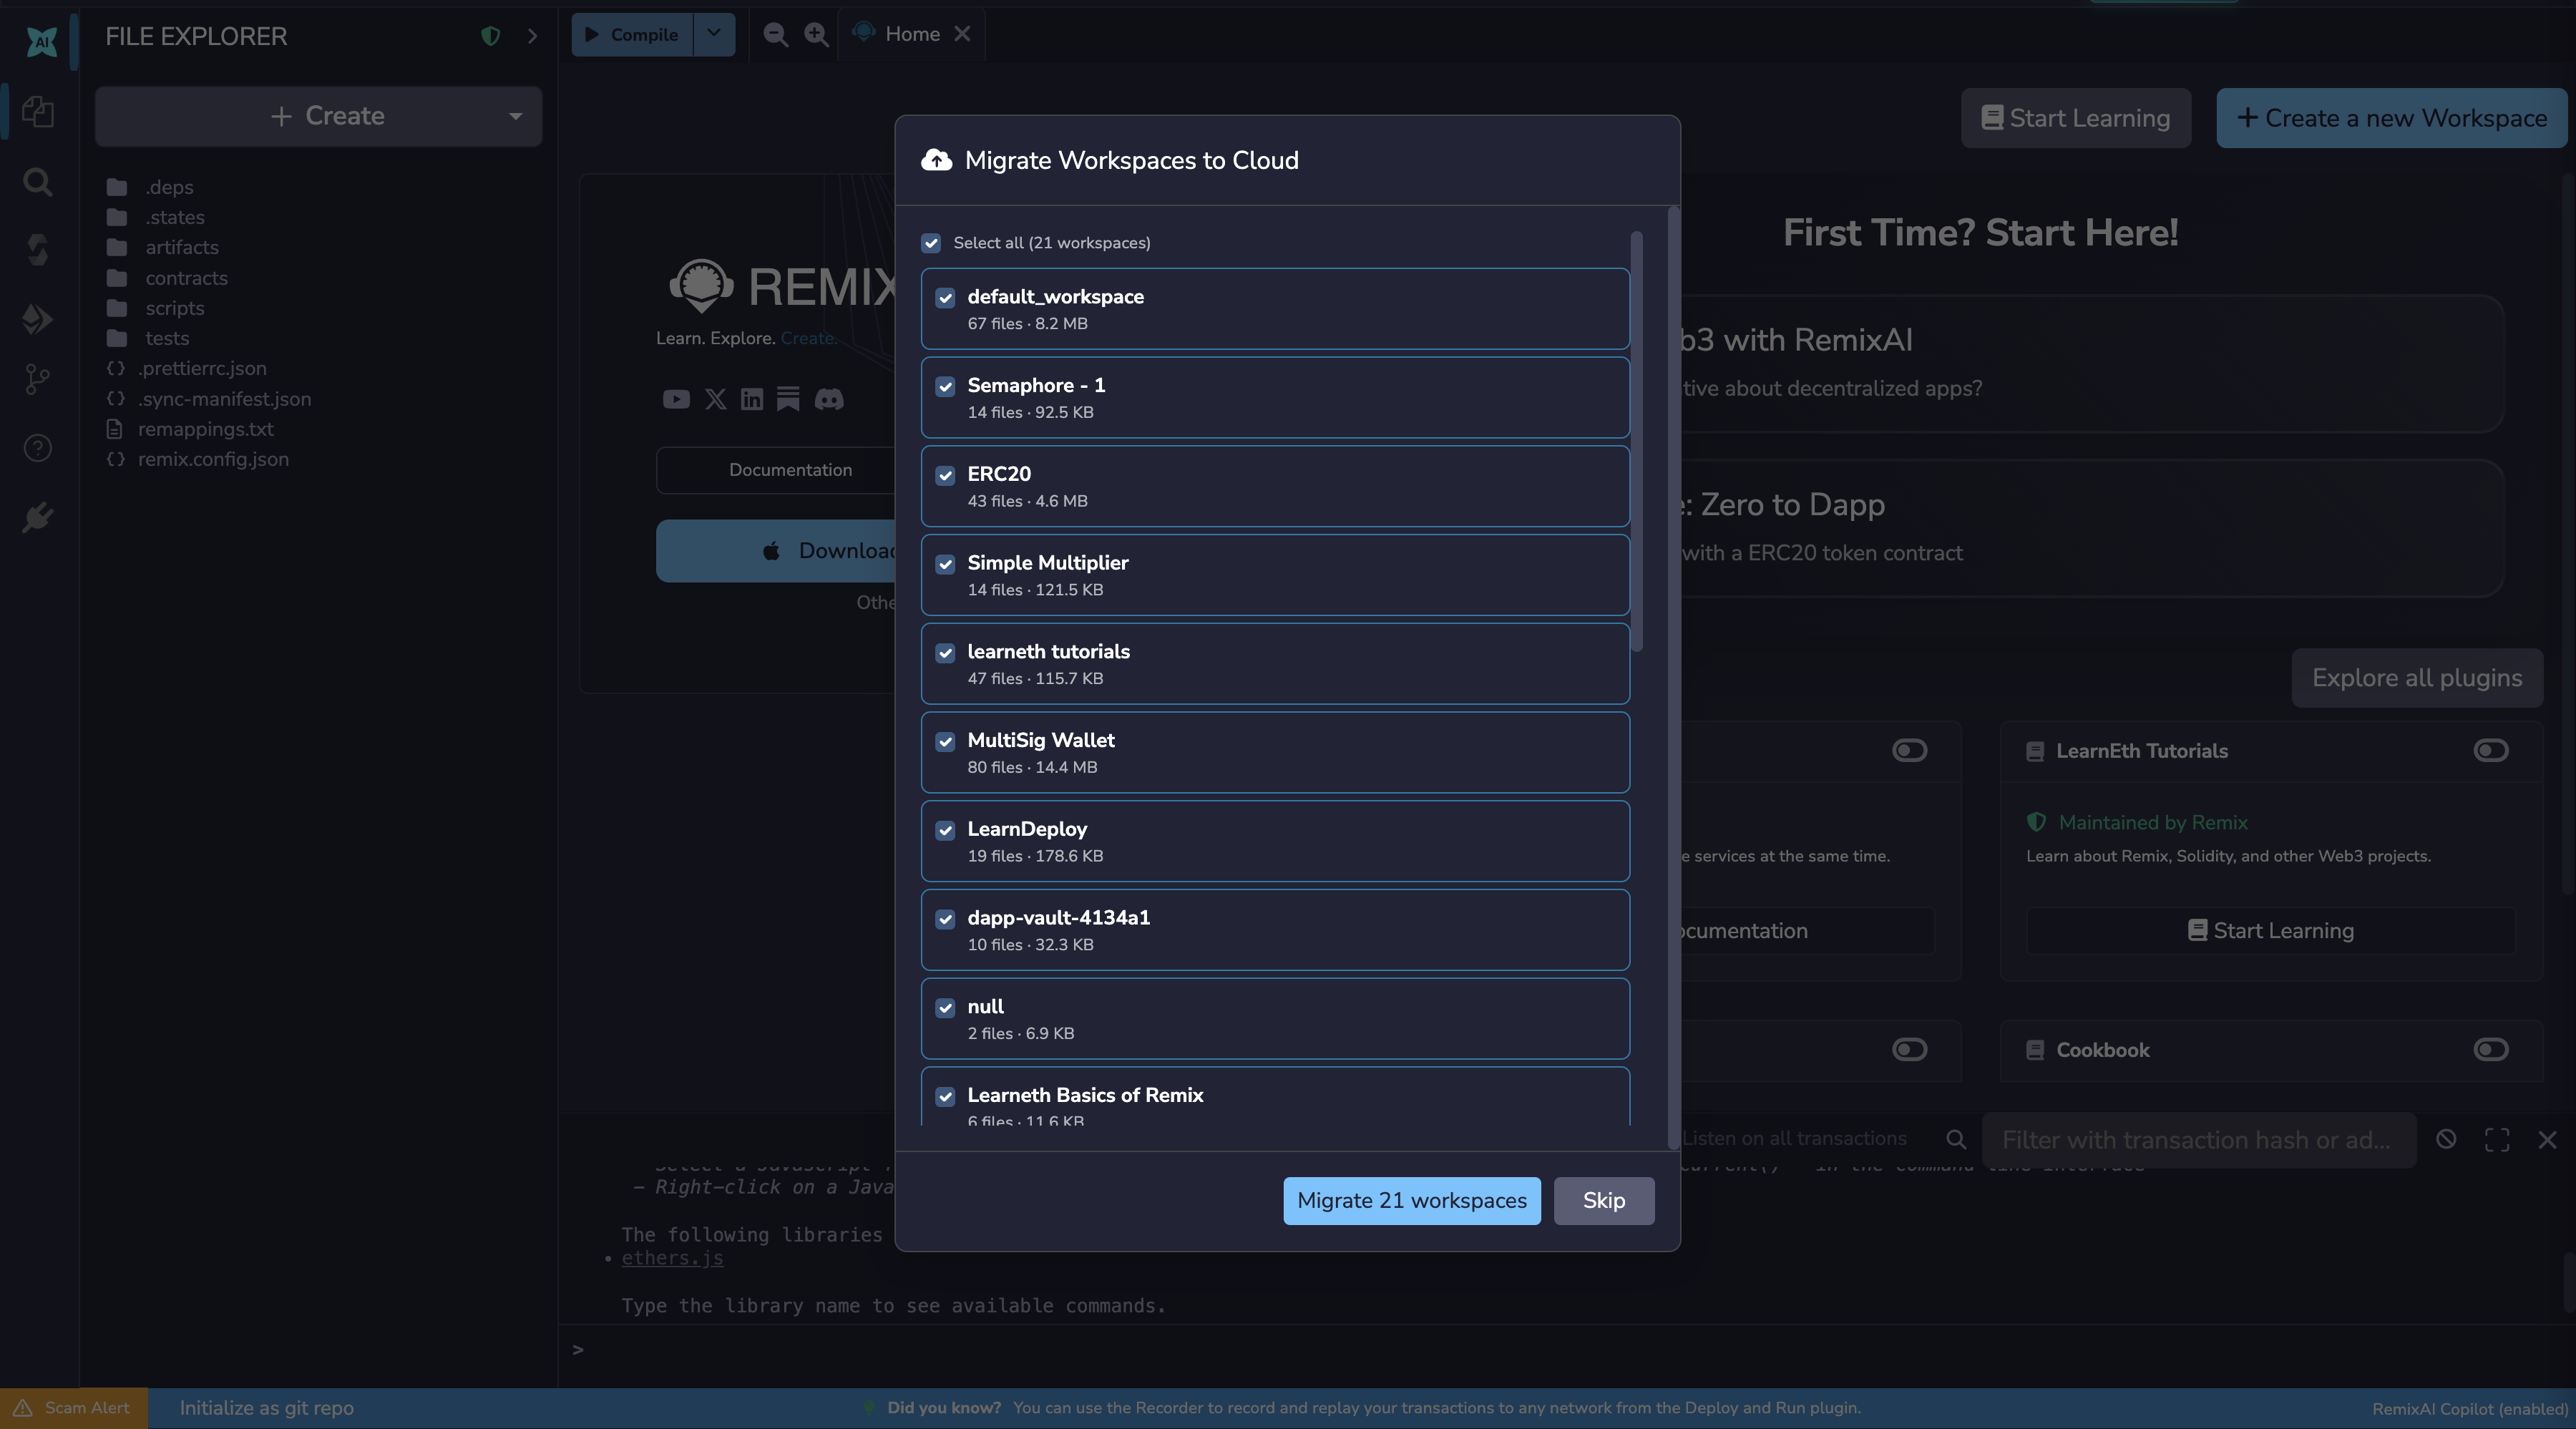
When you enable cloud storage, the files saved on your browser do not get moved to cloud automatically. If you want to migrate the files saved to your browser storage to cloud, click the Workspaces dropdown, and click « migrate local workspaces to cloud ».
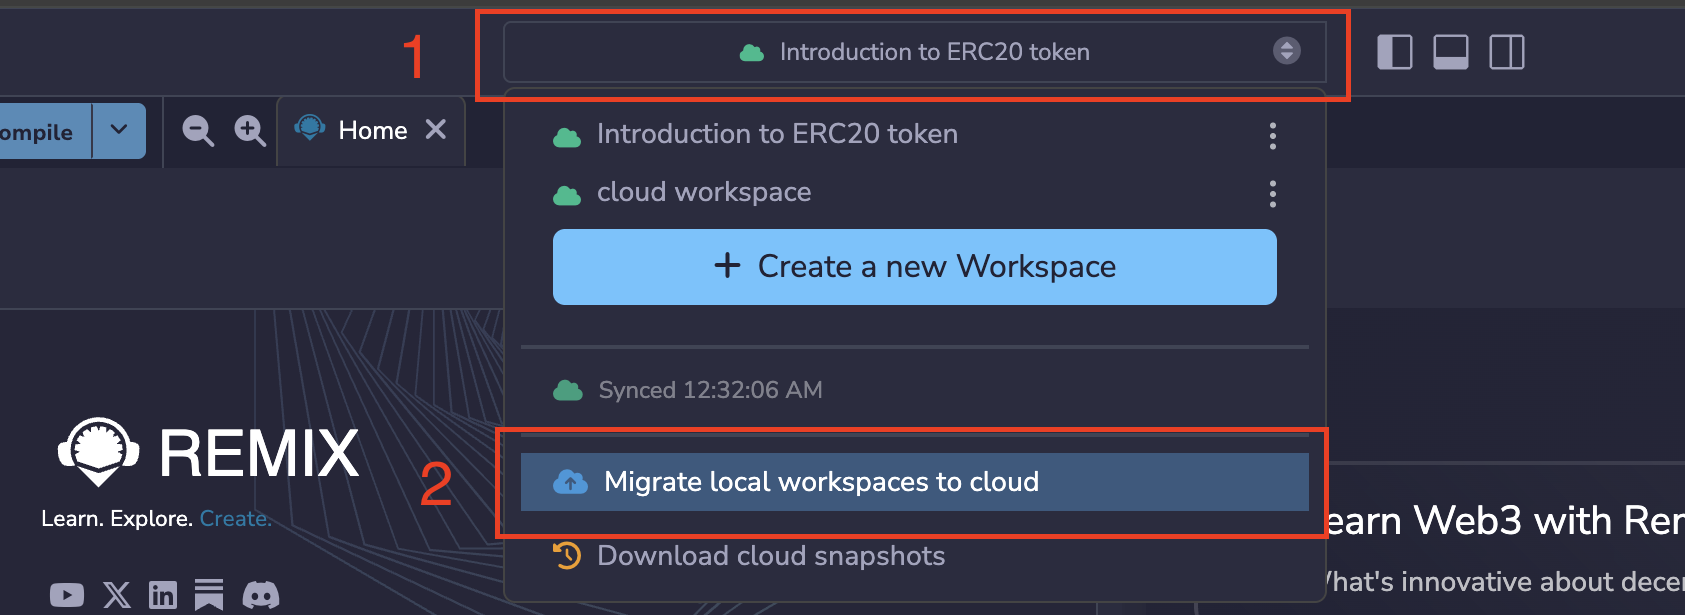
You will see a list of all the workspaces in your browser storage, choose the ones you want to migrate and click the « Migrate » button.
Remix Desktop
Remix Desktop is a version of the Remix IDE that exists as a native app on your computer instead of a browser app. Since it’s a native app on your computer, the files are saved directly to your hard drive. You can download Remix Desktop on the releases page.
Astuce
For more information, see the Remix Desktop documentation.
Connecting Remix to remote Git repositories
Remix IDE supports version control with version control platforms like GitHub (or similar like GitLab) and in the InterPlanetary File System (IPFS), allowing you to store the code you write on remote repositories.
The version control operations are managed with Git through the Git plugin. Additionally, you can manage your branches on the Remix IDE using the branch icon that appears at the bottom of the File Explorer after you initialize Git.

Also see this article about securing your files in Remix.
Publishing to a GitHub gist
In addition to these methods, you can also publish your files to a GitHub Gist. This method just takes a snapshot of your project’s current state and publishes it to a GitHub gist. Any changes made after publishing it will not update the published Gist.
To use this feature, you need to add a GitHub access token with the « Create Gist » permission enabled to Remix because the Gist API requires users to be authenticated to be able to publish a gist.
To generate a GitHub token, visit the GitHub Settings page and select « Generate new token ». Ensure you tick the Create gists checkbox and generate a new token. Copy the token and paste it in Remix’s Settings module in the GitHub Access Token section. And then click « Save ».
After the initial setup, you can publish a gist by right-clicking on a file (publish the file), folder (publish the folder), or Side Bar (publish the entire workspace) and selecting the « Publish folder to gist ».
Astuce
You can publish multiple files by select all of them and right-clicking. The resulting pop-up menu will provide an option to publish them to a gist.
Création de nouveaux fichiers
There are two ways you can create files on the Remix IDE. The first way involves clicking the « Create » dropdown, selecting the « New file » option, and entering the name of the file on the input field that appears.

Another way you can create files in Remix is by right-clicking on the Side Bar (creates the file at the root of your project) or right-clicking on a folder in the Side Bar (creates the file in the folder you clicked) and selecting « New File » from the dropdown options.

Note
Note that (regardless of the method) when you save a file without providing a file extension, it defaults to the .sol extension.
Right-click popup menu
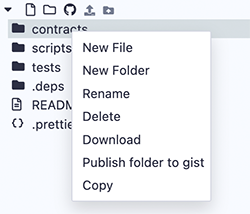
Cliquez avec le bouton droit de la souris sur un dossier
En cliquant avec le bouton droit de la souris sur un dossier, vous ferez apparaître un menu contextuel pour les opérations que vous pouvez effectuer sur ce dossier.
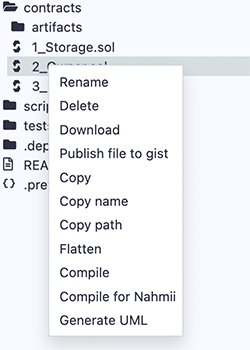
Cliquez avec le bouton droit de la souris sur un fichier Solidity
En cliquant avec le bouton droit de la souris sur un fichier portant l’extension .sol, vous ferez apparaître un menu contextuel comprenant des options de compilation et d’aplatissement, de création de diagrammes UML et de génération de documentation.
Clic droit sur un script
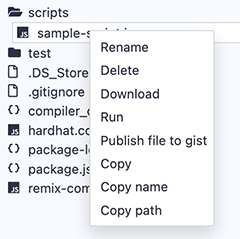
Right-click on any file with a .js or .ts extension to get the Run option in the popup menu to run the script.
Si le script que vous voulez exécuter est le fichier actif dans l’éditeur, vous pouvez également l’exécuter en utilisant le bouton play en haut à gauche de l’éditeur ou en entrant la commande remix.exeCurrent() dans la console.