Exécution de scripts
Remix IDE supports execution of JavaScript & TypeScript files. For some script examples using ethers.js, go to the scripts folder in the Default Workspace or the Basic Workspace.
Why run scripts in Remix?
To mimic how the front-end of your dApp will use ethers.js
Pour déployer et interagir rapidement avec plusieurs instances d’un contrat sans passer par l’interface graphique de Remix.
To run tests on a previous deployed contract.
Writing and running scripts
Create a file with .js or .ts extension and put your logic inside it. To run a script:
Click the play button at the upper left of the Main Panel when the script is the active file in the Editor.
Right click on the script name in the
File Explorersand click on the Run option.Ctrl+Shift+Swhen the script is displayed in the editor.Faites du script le fichier actif dans l’éditeur et exécutez
remix.exeCurrent()depuis le terminal Remix.
Here is a sample .js script:
function test() {
  var num=12;
  if(num<10)
    console.log(num + " is less than 10");
  else
    console.log(num + " is not less than 10");
}

test();
Si vous l’exécutez en utilisant l’une des options mentionnées ci-dessus, le résultat s’affichera dans le terminal Remix.
Script de déploiement d’un contrat
Remix accepts async/await scripts to run ethers.js commands. The script needs to be wrapped in a self executing function.
Mise en place
Scripts will need to access the contract’s ABI. The ABI is located in the contract’s metadata file. Make sure that this metadata file will be created by going to the Settings module and checking that the Generate contract metadata option is indeed checked. (It is enabled by default)
Compiler un fichier Solidity - pour générer les métadonnées du contrat.
In the Deploy & Run plugin, choose the Environment for your script.
Les scripts Async/await fonctionnent dans tous les environnements : la VM Remix, le fournisseur injecté (généralement MetaMask) et le fournisseur HTTP externe.
Compile and run script
In the Solidity Compiler, there is a button called « Compile and Run script ».
When drafting a contract, it can be helpful to run a script just after the compilation succeeds that will deploy and set the state.
The script can contains Mocha tests to be run.
In order to connect a contract with a script, add the NatSpec tag @custom:dev-run-script to the contract followed by the absolute file path, like:
  /**
   * @title ContractName
   * @dev ContractDescription
   * @custom:dev-run-script file_path
   */
  contract ContractName {}
When you are ready to deploy the code for real, remove the NatSpec comment @custom:dev-run-script.
ShortCut: Ctrl+Shift+S , when editing a solidity file, will compile that file and then will run the script. In contrast, ctrl+S will only start the compiling.
Adding external dependencies
Remix has organized JS/TS dependencies into sets called « Configurations ».
These dependencies are available for use in your scripts.
The following list contains the Default dependencies:
ethers (v5): Ethers v5 docszokrates-js: Zokrates docsweb3: Web3js docszksync-ethers: Zksync Ethers docsstarknet: JavaScript library for Starknet docssnarkjs: Snarkjs docscircomlibjs: Circomlibjs docsffjavascript: Finite Field Library in Javascript docsbig-integer: Big integer docs@zk-kit/incremental-merkle-tree: Incremental Merkle tree implementation in TypeScript docssindri: Sindri CLI TypeScript SDK@semaphore-protocol/data: Semaphore data docs@semaphore-protocol/group: Semaphore group docs@semaphore-protocol/identity: Semaphore identity docs@semaphore-protocol/proof: Semaphore proof docscrypto-js: Cryptojs docsaes-js: AES-JS docsmultihashes: Multihashes docs
Loading other script dependencies
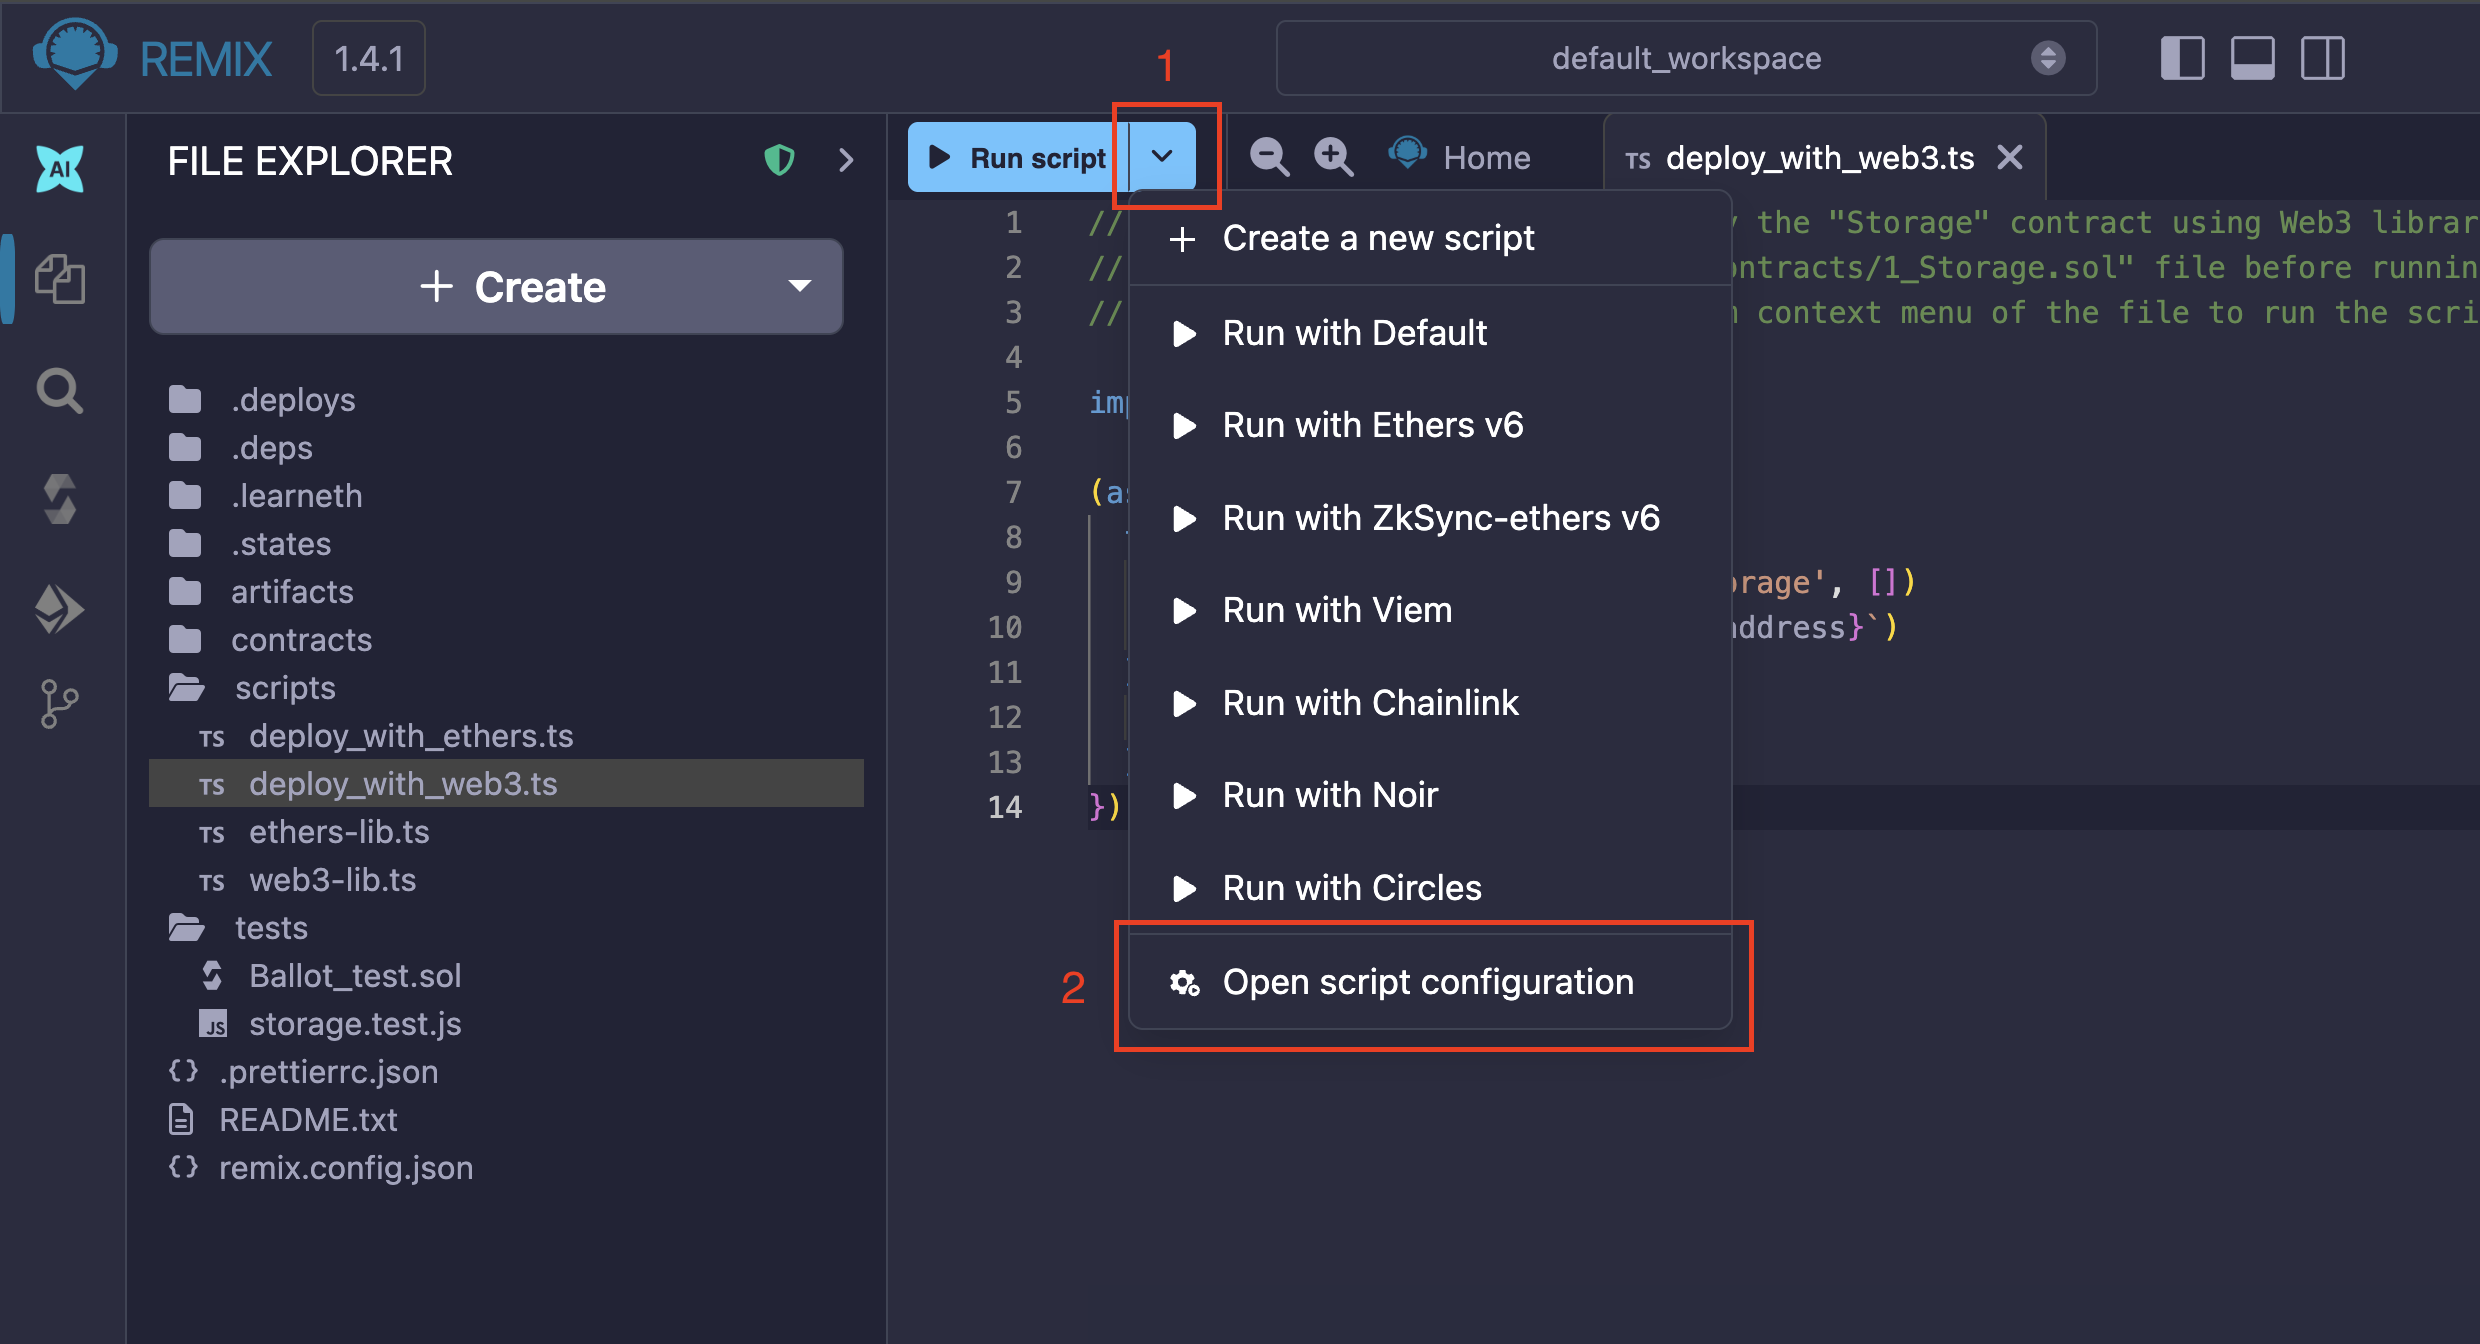
If you don’t see what you need in the Default configuration of scripts, you can load other configurations of scripts using the Script Configuration panel. This panel is accessed from the dropdown on the « Run Script » button.
Note
If the active file in the Editor is not a script, then the « Run Script » button turns into the « Compile » button and the Open script configuration option is not present.
It is not necessary to install the scripts to use; just use the import or require keyword. For example:
//using require
const { expect } = require("chai");

//using import
import { UltraHonkBackend } from "@aztec/bb.js";
If you try to import an unsupported module, you will get the error below:
<module_name> module require is not supported by Remix IDE