Solidity Unit Testing plugin
The Solidity Unit Testing plugin allows you to write and run automated tests for your Solidity smart contracts to verify they work correctly before deployment.
It helps you generate test files, write test functions using a built-in assertion library (like Assert.equal, Assert.notEqual), and execute those tests in a separate environment to see pass/fail results.
Activating the Solidity unit testing plugin
To activate the plugin, go to the Plugin Manager, search “Unit Testing” and enable the “Solidity Unit Testing” plugin.
When the plugin loads, you’ll see a screen like this:
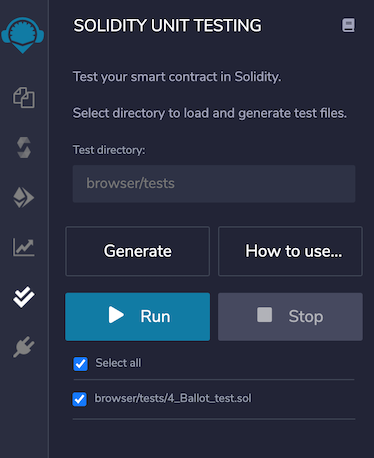
Test directory
When you load the plugin, you need to specify a directory where the plugin will load and store test files. By default, it’s a tests folder at the root of your Workspace.
Note
The plugin will not automatically create directories. You must click “Create” to generate the specified folder structure.
After specifying the test folder, click the “Create” button. Alternatively, you can select an existing folder as the tests folder by typing “/” followed by the name of the folder.

Generating tests
The plugin can generate generic test files that contain information about developing tests for a contract. The name of the generic test file is determined by the currently active .sol file on the Main Panel. If there is no active file, a generic test file named, newFile_test.sol will be created.
Below is an example of a generic test file:
pragma solidity >=0.4.22 <0.8.0;
import "remix_tests.sol"; // this import is automatically injected by Remix.
import "remix_accounts.sol";
// Import here the file to test.

// File name has to end with '_test.sol', this file can contain more than one testSuite contracts
contract testSuite {

    /// 'beforeAll' runs before all other tests
    /// More special functions are: 'beforeEach', 'beforeAll', 'afterEach' & 'afterAll'
    function beforeAll() public {
        // Here should instantiate tested contract
        Assert.equal(uint(1), uint(1), "1 should be equal to 1");
    }

    function checkSuccess() public {
        // Use 'Assert' to test the contract,
        // See documentation: https://remix-ide.readthedocs.io/en/latest/assert_library.html
        Assert.equal(uint(2), uint(2), "2 should be equal to 2");
        Assert.notEqual(uint(2), uint(3), "2 should not be equal to 3");
    }

    function checkSuccess2() public pure returns (bool) {
        // Use the return value (true or false) to test the contract
        return true;
    }

    function checkFailure() public {
        Assert.equal(uint(1), uint(2), "1 is not equal to 2");
    }

    /// Custom Transaction Context
    /// See more: https://remix-ide.readthedocs.io/en/latest/unittesting.html#customization
    /// #sender: account-1
    /// #value: 100
    function checkSenderAndValue() public payable {
        // account index varies 0-9, value is in wei
        Assert.equal(msg.sender, TestsAccounts.getAccount(1), "Invalid sender");
        Assert.equal(msg.value, 100, "Invalid value");
    }
}
Writing tests
Write sufficient unit tests to ensure that your contract works as expected under different scenarios.
Remix injects a built-in assert library for testing. You can visit the library documentation here.
Additionally, Remix allows the usage of special functions in the test file to make testing more structural. They are:
beforeEach()- Runs before each testbeforeAll()- Runs before all testsafterEach()- Runs after each testafterAll()- Runs after all tests
To get started, see this simple example.
Tip
You can use RemixAI to generate tests for your files.
Running tests
Once you are done with writing tests, select the file(s) and click on Run to execute the tests. The execution will run in a separate environment. After completing the execution of one file, a test summary will be shown:
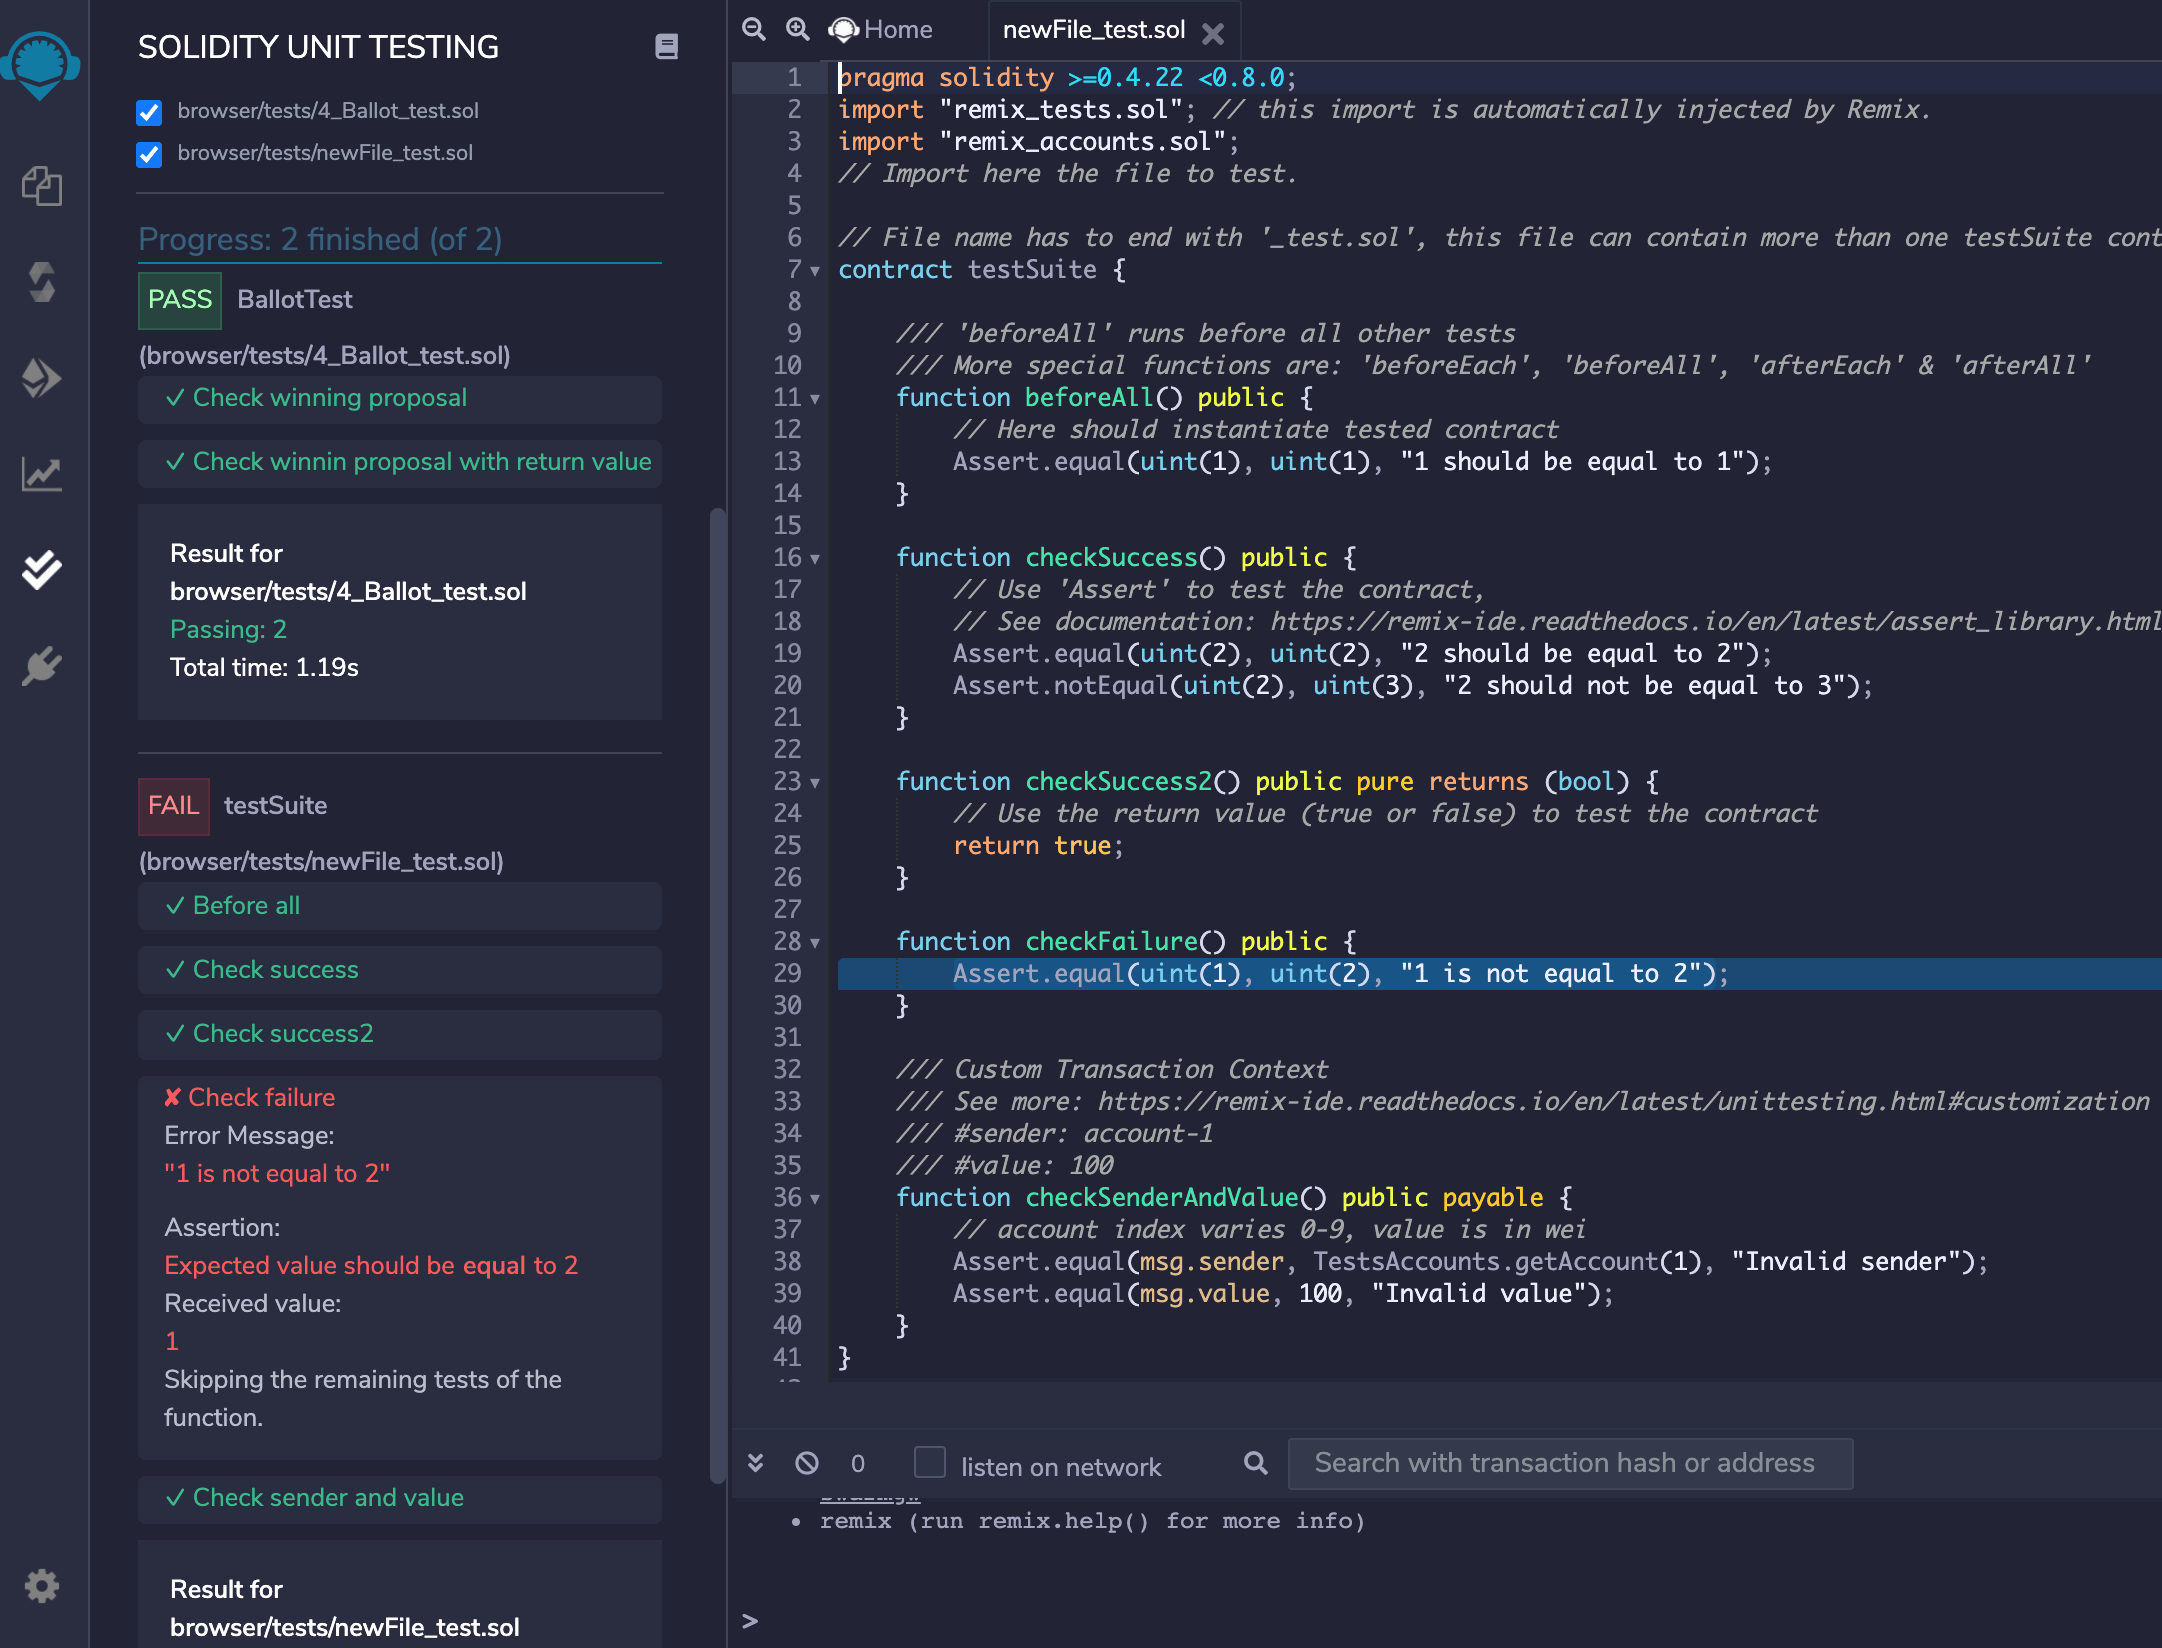
For failed tests, there will be more assertion details to analyze the issue. Clicking on failed test will highlight the relevant line of code in the editor.
Stopping tests
If you have selected multiple files to run the tests and want to stop the execution, click on Stop button. It will stop execution after running the tests for current file.
Customizing tests
Remix facilitates users with various types of customizations to test a contract properly.
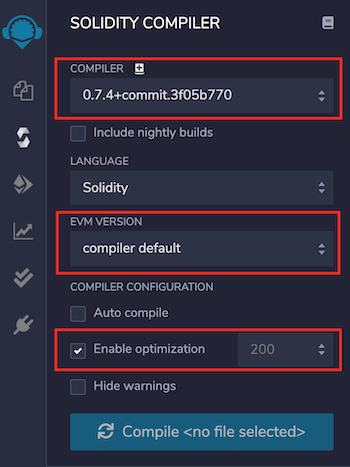
1. Custom Compiler Context
Solidity Unit Testing refers to the Solidity Compiler plugin for compiler configurations. Configure Compiler, EVM Version, Enable Optimization & runs in the Solidity Compiler plugin and this will be used in the Solidity Unit Testing plugin for contract compilation before running unit tests.
2. Custom Transaction Context
For interacting with a contract’s method, the main parameters of a transaction are from address, value & gas. Typically, a method’s behaviour is tested with different values of these parameters.
One can input custom values for msg.sender & msg.value of transaction using NatSpec comments, like:
/// #sender: account-0
/// #value: 10
function checkSenderIs0AndValueis10 () public payable {
    Assert.equal(msg.sender, TestsAccounts.getAccount(0), "wrong sender in checkSenderIs0AndValueis10");
    Assert.equal(msg.value, 10, "wrong value in checkSenderIs0AndValueis10");
}
Instructions to use:
Parameters must be defined in the method’s NatSpec
Each parameter key should be prefixed with a hash (#) and end with a colon following a space (: ) like
#sender:&#value:For now, customization is only available for parameters
sender&valueSender is the
fromaddress of a transaction which is accessed usingmsg.senderinside a contract method. It should be defined in a fixed format as ‘account-<account_index>’<account_index>varies from0-2before remix-ide release v0.10.0 and0-9afterwardsremix_accounts.sol must be imported in your test file to use custom
senderValue is
valuesent along with a transaction inweiwhich is accessed usingmsg.valueinside a contract method. It should be a number.
Regarding gas, Remix estimates the required gas for each transaction internally. Still if a contract deployment fails with Out-of-Gas error, it tries to redeploy it by doubling the gas. Deployment failing with double gas will show error: contract deployment failed after trying twice: The contract code couldn't be stored, please check your gas limit
Various test examples can be seen in examples section.
Points to remember
A test contract cannot have a method with parameters. Having one such method will show error:
Method 'methodname' can not have parameters inside a test contractNumber of test accounts are
3before remix-ide release v0.10.0 and10afterwardsWhile a test file which imports remix_accounts.sol might not compile successfully with Solidity Compiler plugin, do not worry, this will have no bearing on its success with Solidity Unit Testing plugin.